
 Cardboard Engineering (CBE, sometimes also Cardboard Modeling) is in general the building of models from cardboard. These models are usually quick and inexpensive to build, but often not very durable. In lean manufacturing, these cardboard models are often workstations or entire assembly lines to test different concepts before building the whole thing in more expensive and time-consuming aluminum and steel. This allows faster and easier experimentation with different concepts to improve your production system.
Introduction
 Cardboard is often used for the packaging of goods. Afterward it is disposed of (and hopefully recycled). Hence, it is a readily and freely available material. Even if you buy it (because you need more, or you want higher grade), it is not that expensive. Hence it fits one requirement for models: it is cheap!
Second, it is easy to modify. Cutting and gluing cardboard is quick and easy. Hence it is also quick and easy to build models.
Its disadvantage is that it is not very durable. Cardboard models don’t last very long if you have to handle them.
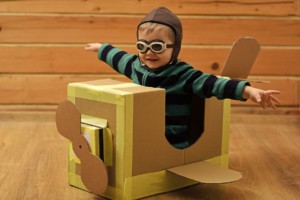
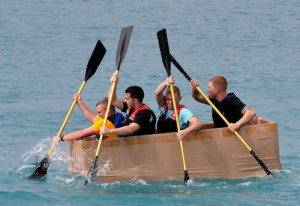 Cardboard models have many uses. The image above shows a Nintendo Labo cardboard piano interacting with the Switch gaming console. Cardboard boat races or bridge constructions are a fun and easy way to teach engineering skills. Cardboard toy planes are also common
What Is It Used For in Lean?
We are interested in the use of cardboard engineering for lean manufacturing. These models are usually on a 1:1 scale (i.e., full sized). They are to simulate a subsequent real-world situation in order to identify problems and improvement potentials. The model is then adjusted to eliminate the problem and to improve the performance of the system. And, oh, it is also usually great fun and a wonderful way to create team building, employee interaction, and to improve motivation!
 There are a couple of uses for these models. I usually find that there are two main groups of models: rough models for large systems, and detailed models for smaller systems. The rough models are for the big picture. In other words, “what goes where” to optimize the floor space. The detailed models are to optimize the actual processes like ergonomics, performance, material flow, and so on. It is rare to have a model that is both large and detailed, since it simply takes too much time to build. A possible combination, however, is a large model that has some detailed parts for optimization. Anyway, the two main directions are as follows:
Optimize Layout: Figure out if the machines and equipment fit in the space you have on the shop floor, and how to best fit it. Can you still access it for maintenance? Are the emergency exits blocked? Is there enough space for the forklift to pass through? If your goal is to merely find out if it fits, then you do not need to model the system in great detail. A rough model is easy enough here.
Optimize for Ergonomics, Performance, and Material Flow: Where should be what? Is it within easy reach, even for the not-so-tall employees? How long do the tasks take? Where does the material go into the system? Where does it go out? How is it handled? Do you have enough space? Do you have enough material? For these kind of questions you need a more detailed model.
What Do You Need?
![]() Cardboard. Lots of cardboard. This should usually not be a problem. Pretty much any plant I know throws out piles of cardboard on a daily basis. Just collect these boxes for a few days and you should be all set. Boxes that are still re-foldable into a box rather than flat may make your life easier later on. You can also use flat cardboard, but in this case you have a bit more work to create 3D models out of 2D cardboard. If you happen to come across some cardboard tubes or similar items, you may put them aside too, since they may be useful later on. If for some reason you do not have cardboard, you can simply buy it. Also, while it is called Cardboard Engineering, you are not limited to cardboard. Feel free to use whatever is at your disposal. If you have some wood or plastic tubing lying around, feel free to use them too. If you have a work table that won’t change, just build the gadgets on top of the table. Keep in mind, however, that cardboard is easiest, and you may need additional tools like saws, drills, and screws if you use other materials.
Cardboard. Lots of cardboard. This should usually not be a problem. Pretty much any plant I know throws out piles of cardboard on a daily basis. Just collect these boxes for a few days and you should be all set. Boxes that are still re-foldable into a box rather than flat may make your life easier later on. You can also use flat cardboard, but in this case you have a bit more work to create 3D models out of 2D cardboard. If you happen to come across some cardboard tubes or similar items, you may put them aside too, since they may be useful later on. If for some reason you do not have cardboard, you can simply buy it. Also, while it is called Cardboard Engineering, you are not limited to cardboard. Feel free to use whatever is at your disposal. If you have some wood or plastic tubing lying around, feel free to use them too. If you have a work table that won’t change, just build the gadgets on top of the table. Keep in mind, however, that cardboard is easiest, and you may need additional tools like saws, drills, and screws if you use other materials.
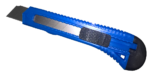 Something to Cut. You will have to cut the cardboard down to size. A pair of scissors, however, is not the perfect tool for cardboard (although it is still good to have one around). Much better is a box cutter, also called a carpet knife. These are also much safer than a normal knife. Make sure you have enough knives. If you have sturdier material like more rigid cardboard profiles, you may also need a saw. A simple hand saw will usually be good enough, although you may also use electric saws.
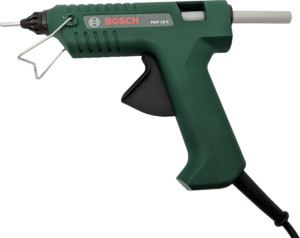 Something to Join. You will also have to attach cardboard pieces to other cardboard pieces. Here you have multiple options. You can get adhesive packing tape. You probably should have these rolls somewhere in your plant too. You can also get a stapler, or even a specialized box stapler if you have one. You can also use glue. Here I recommend a hot glue gun; the glue hardens much faster and holds much better than a regular glue. It also makes a sturdier connection than tape. If you plan to use a glue gun, make sure you have an extension cord. The cable of the glue gun is usually not long enough for larger projects. If you have multiple glue guns, plan a separate extension cord for each of them, rather than a multi-outlet extension cord. Otherwise you are again limited in range by the distance to the other glue guns.
 Something to Mark. Finally, you will probably want to mark the model, add signs and directions, and in general fiddle with visual management. This is especially important for detailed models. hence make sure to bring some flip chart markers in different colors. You can also bring colored paper for fancier markings. Adhesive dot labels or similar may also be used. In a pinch, adhesive packing or painter’s tape can also be used to mark the cardboard.
Something to Document. The model may not be there for long. Hence, take pictures while it is still looking good. Make sure you have permission to take photos. You may even take videos. Again, make sure you have permission and the union representative is informed (or even involved in the workshop).
So now you have all the material you need to make a cardboard engineering workshop. This I will describe you in the next post. Until then go out, get your glue guns ready, and organize your industry!
Overview of Posts
- Cardboard Engineering – Preparation
- Cardboard Engineering – Workshop
- Cardboard Engineering – Alternatives
I agree mockups and indeed physical aids in general are very valuable and aid cooperation, coordination and communication. The idea of 1:1 was new to me and of course storage of the models could be a problem.
Cardboard can be quite durable for small models but otherwise something like balsa wood or thin plywood etc can be used. I have also used security plastic cards which if lightly warmed over a gas flame can be curved. Many discarded containers and formers can be usefully used. Employment of grandchildren is a cheap and enthusiastic resource. Is there a minimum age for teaching lean principles?
Hello Chris,
Maybe this video (2017) from the LeanLab of Ostbayerische Technische Hochschule Regensburg is interesting for the topic of this post:
https://www.youtube.com/watch?v=Vptgegfcedo
Very interesting video. I have never seen a cardboard workpiece carrier with kit and other stuff. It probably is suitable for short runs, and not for longer production. Interesting indeed.