
 Standard work, or better called standardized work, is a popular method in lean manufacturing. It is closely related to standards and hence part of this longer series on standards, but with a focus on manufacturing or assembly. The actual creation of the work standard is only one of the last steps, and a lot of time is put into balancing the production and matching the customer takt. I have written a lot about some of these aspects before, but let me give you an overview.
Introduction

The terminology here is not really standardized (like for many other methods in lean). If you go down to the details, a work standard is an instruction on how to do a manual work. A standard work not only reverses the order of these words, but is a method to go from the customer takt to the line balancing to a work standard. Standardized work is the same as standard work, but the wording implies a bit more flexibility and less rigor… which is often a good thing. In practice, all these terms are often mixed together and used interchangeably.
Standardized work is therefore for manufacturing or assembly, where you not only repeat the standardized manual work frequently, but also have to fit the work content within the customer takt. Let me give you an overview of the steps. I won’t go into great detail, since I have already written about the different details elsewhere. Hence there will be plenty of links to other blog posts of mine.
Step 1: Customer Takt, OEE, and Cycle Time
The first step in setting up standards for assembly or manufacturing is to determine the customer takt. How much time do you have to make one part and still match the customer takt. The customer takt is the available work time divided by the demand of the customer during this available work time. This can be calculated either for one product type, or for a combination of all products that have to go through the process. For more, see my posts How to determine Takt Times and Pitfalls of Takt Times.
\[ Customer \; Takt = \frac{Available \; Work \; Time}{Customer \; Demand \; during \; available \; Work \; Time}\]The takt includes all the losses, problems, and other troubles. The customer takt is also our target for the line takt, i.e. the average production of our line (or, generally, process). However, we also need the cycle time, which is the time needed for one cycle under ideal circumstances, excluding all losses, problems, and other troubles. The difference between the takt time and the cycle time is the OEE. For example, if your customer takt is 40 seconds per piece, and you estimate your OEE to be 80%, then the target cycle time is 40s ⋅ 80% = 32s. You have to make a part every 32 seconds under ideal circumstances to get an average of a part every 40 seconds under not ideal circumstances. For more details, see my articles on How to Measure Cycle Times Part 1 and Part 2, Cycle Times for Manual Processes, and my series on the OEE.
Step 2: Production Capacity Sheet
Next you need to get an overview of the tasks. This is often called the production capacity sheet. What steps need to be done, and how much time do they need. An example is shown below. I go into more details at Toyota Standard Work – Part 1: Production Capacity.

Step 3: Standard Work Combination Table (i.e., Line Balancing)
Next you need to arrange the tasks in a feasible sequence, with the work content in each station fitting within the target cycle time. This is called Standard Work Combination Table if you use the style that Toyota does. More on this in my post Toyota Standard Work – Part 2: Standard Work Combination Table. However, there are also other approaches possible. I have an extensive six post series on line balancing, and another four-post series on how to do this for flexible manpower lines, of which especially the third post with an example is useful here. For very small lot sizes, mixed model sequencing may also be relevant, and I have a 12 post series on that too.

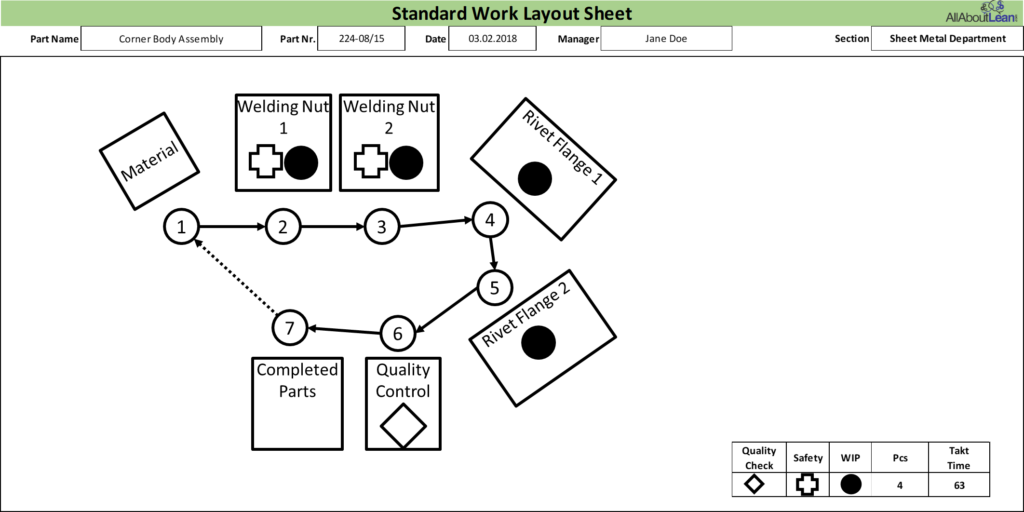
Step 4: Line Layout
If you establish a completely new line, you may also think about the line layout. At Toyota this is called the Standard Work Layout, and I wrote about it in a previous blog post. But line layout is also a complex topic, and you can find more on this in another series of blog posts on mine on line layout.
Step 5: Work Standard
Now you should know which tasks have to be done at which station and how fast. Now you can create the work standard, standardizing the repetitive task for the operators. The previous posts of this current series on standards have a lot of good information on standards in general, and also apply to this work standard. This works standard describes the work sequence in the necessary detail (not too much detail, mind you). In my next post I will show you a work standard I have created as an example of what it could look like.
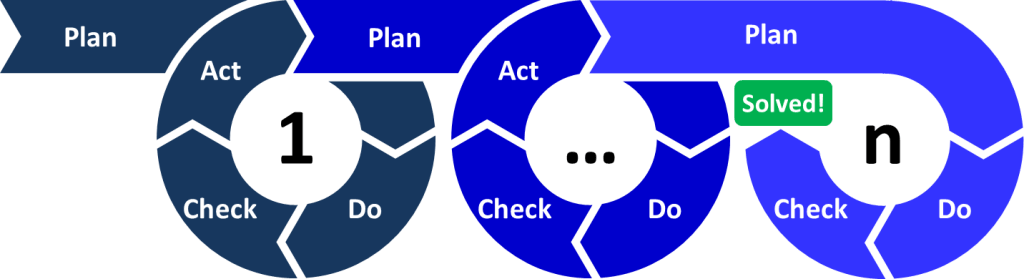
Step 6: Iterate, PDCA, Improve
 These steps above are shown as a simple sequence. However, this is not quite true. You may see at step 3 a possibility to reduce the time for a task. Then you go back to step 2 to update the production capacity sheet, and then update step 3. Or you may see a problem at step 4, where a machine cannot be moved to where you wanted it to be, and the worker has to walk a bit more. This means redoing step 3. In sum, there is a lot of back and forth between the steps. This is a hassle, but it makes a better standard.
Also, make sure your standard works! Do not forget the Check and Act parts, but verify on the shop floor if the standard works as good as it should be. Ask the operators if they agree. Fix the standard if it is not good enough.
Finally there is continuous improvement. This of course does not mean to work on the standard all the time, but it does mean to work on improvement in general frequently. If the standardized work you have created causes problems, you may have to improve the system and then standard to fix the problem. If you see an worthwhile improvement potential with the standardized work, update the system and the standard to capture this potential.
As you see, there is plenty to do to create a good standardized work. In my next post, I will show you an example of a work standard, which is one of the last steps of standardized work. Now, go out, get your standardized work in order, and organize your industry!
Series Overview
- Standards Part 1: What Are Standards?
- Standards Part 2: Why and Where to Do Standards
- Standards Part 3: How to Write a Standard
- Standards Part 4: How to Write a Standard (Continued)
- Standards Part 5: How to Use and Improve a Standard
- Standards Part 6: Standardized Work
- Standards Part 7: How to Write a Work Standard
- Standards Part 8: Example for a Work Standard
- Standards Part 9: Leader Standard Work
Hi Christoph
It´s very interesting your article and the images have a very good quality. I would need more information about U-lines.
I will follow your magazine because has a great information.
Hi Flujo, I have some articles about U-Lines, especially Line Layout Strategies – Part 2: I-, U-, S-, and L-Lines. Check also my list of all posts. Hopefully you will find some helpful stuff there.
Hi Professor,
This article reinforces that the plan stage is PDCA is one of the most critical. In the development of standard work time must be put in to gathering data and preparing an area for a standard. In the development of a lean process where do you put primary emphasis? Would you work to develop a standard before making changes, concurrently to a project, or after the area is in a satisfactory state and awaiting continuous improvements.
Hello Ethan, at Toyota, the first step is stability. Get your machines to run reasonably stable (maybe around 80% uptime). If you have at least somewhat stable machines work on improving the standards.